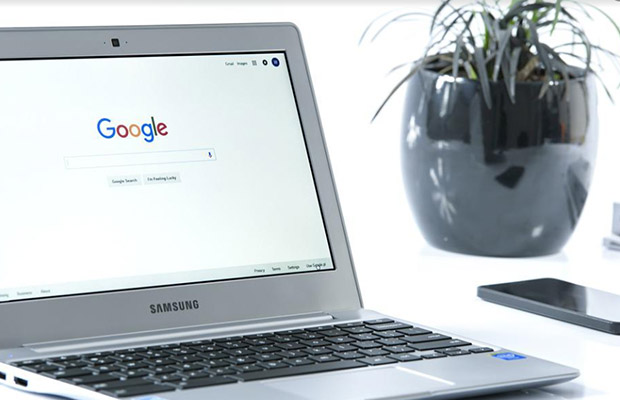
A Chromebook is a laptop or tablet that uses Chrome OS, a Linux-based operating system. With the Google Chrome browser and many applications and data stored in the cloud rather than on the machine, they are typically used to carry out various tasks.
Some users claimed that the error only affects a small number of specific printers, while others claimed that even though the printer was connected to the Chromebook, they were unable to print anything. Our article will be helpful to you if your Chromebook and printer are having the same problem.
Table of Contents
The Reason Your Chromebook Cannot Connect To Printer
The majority of computers use a wireless or USB connection to connect to printers. Printing is also possible on Chromebooks, but the procedure is slightly different. Chromebooks use Google Cloud Print, which eliminates the need for a direct connection to a printer.
When compared to a Windows 10 or Macbook laptop, Chrome is used in a different way. Because of this, installing a printer is carried out somewhat differently than you are used to. Learn how to connect a printer to a Chromebook in this article.
Thankfully, printing from a Chromebook only requires a few easy steps. However, all that is necessary is a printer that is Google Cloud Print Ready. Therefore, you should ensure that the new printer you buy is Cloud ready to make your life easier.
After setting up your Cloud Ready printer, use your Chromebook to check your connection. To do that, adhere to the instructions below:
1: Open Chrome Browser.
2: You must enter “chrome” in the new tab://devices in the address bar.
3: Currently, you can find your printer listed under “My Devices” on the left.
4: Once you’ve made sure your new printer is listed, you must either choose the print from a pull-down menu in the top-right corner of your Chrome browser or press the CTRL+P keyboard shortcut.
How Can A Printer Be Connected To A Chromebook?
See how to connect the printer to a Chromebook by following the steps provided below:
Step 1: Launch Settings
1: Make sure your computer is turned on and connected to the router before continuing.
2: On your Chromebook, launch Google Chrome, and then click Settings.
3: The hamburger menu is located at the top left and must be opened next.
4: Click on Next.
Second: Select Printer Settings:
1: A new screen will appear in this step.
2: Now, use the top search bar or scroll down.
3: Next, click Printers.
Step 3: Include the Printer:
1: The Chromebook is currently looking for networks and printers that are network-connected.
2: Next, watch for the printer to start printing.
3: Click Add again after selecting the printer.
Use a wired printer in the fourth step:
Check to see if the printer is on and connected to your Chromebook with a USB cable. then take the subsequent actions:
1: Start by opening the file you want to print.
2: Right-click Settings in the top right corner of the Chrome window and choose Print from the menu that appears.
3: Click the edit button on the side of the next screen, then choose the appropriate HP printer.
4: Once chosen, printing can begin.
How To Connect Your Printer Without Internet?
You can skip the step where you connect your printer to your Chromebook’s home network if you want to connect it to it without using the internet. To begin, click the time button on your Chromebook’s screen. Then, follow the instructions in the previous section.
- If you haven’t already, log into your Chromebook and select the time in the bottom-right corner of the screen.
- Open the Settings.
- To expand them, select the “Advanced” button.
- Select “Printers” from the list of options under “Printing.”
- To quickly add a printer, click the “Add Nearby Printers” button. Select “Add Manually” if you don’t see your printer on the list.”
- Enter the necessary printer information here: give your printer a name and type it In the “Address” field, enter an IP address. Try using “IPP” as your first option since it is the most popular protocol. IPP/print is the usual queue name.”
- Click “Add” to finish.”
- Follow the instructions in the PPD files and printer configuration if your Chromebook cannot use the printer. You’ll be prompted by Chromebook to select the printer’s model and manufacturer. You can find this information by looking at the printer’s label or user guide.
- If your printer isn’t entirely supported, you can use the advanced setup method. Look under “emulation” or “printer language” in the printer’s details.” Next, select “Generic.” At the very end, press the “Add” button.
When Printing, Do You Encounter The Dreaded “Pwg Error”?
Users of Chromebooks who attempt to print using a Google Cloud Printer frequently run into this problem. Mixed results are obtained. On the initial setup, it usually prints. However, it will then function erratically.
On a blank page, a typical error will appear with text that appears something like:
“PWG ERROR – Incomplete Session by time out”
Other information such as Position, System, Line, Version, and an Error Code will also be included.
This is a well-known bug that is discussed in great detail on the Google Product Forums.
Please use either tool to report this error so Google can fix it.
There are only a few solutions you can try to fix it.
Update Your Drivers
This is the first option you should try to permanently resolve the problem. When a printer won’t print, outdated drivers are typically the main cause.
In light of the fact that a driver is required for communication between the printer and the Chromebook, updating it would be a good place to start.
The simplest way to find your driver is to search for the brand and model of your printer because there are numerous printer models available.
For example, if you have a Canon MX942, you’d search “canon mx942 driver” with your favorite search engine. Discover a page with a download, download it, then install it. It should be the official manufacturer’s page. For more information, see the section after this one.
Try printing something to test it after you’ve done that. Since driving is such a foreign concept to many people, most people find it to be the most difficult part.
Post a comment below and let me know if you need assistance finding your driver.
Reboot It Before Printing
The next approach is unusual and, while it occasionally succeeds, does not resolve the issue. The printer can be restarted before each print if the driver approach hasn’t worked for you.
This is annoying, but it might work, and it’s a band-aid fix until Google fixes its problems.
Enter The Pages To Be Printed
Finally, there is one more option you can try that has a fantastic success rate.
This clever tip was sent in by a reader, and as far as I know, it works with a few Google Cloud Print-compatible printers.
The trick is to find the document you want to print, click print, and then look for the “Pages” field in the little window that pops up. By default, it’s set to “All” so your printer will queue a print job that highlights every page.
Instead, try selecting the pages you want to print one at a time.
So if have a 10-page document, instead of hitting Print > All, try punching in (manually) each page you want to be printed.
In this example, the “Pages” input field will be filled with the numbers 1, 2, 3, 4, 5, 6, 7, 8, and 10. After a brief test, the advice appears to be effective, and if you’ve tried everything else, it’s definitely worth a shot.
After the pages are entered, press the “Tab” key a few times for reassurance (it’ll deselect the field), and then cross your fingers and hit the “Print” button.


